The Layout Properties page is displayed after saving a new layout or opening an existing layout for editing. For instructions on accessing the Page Layouts tab, see Access Page Layouts Tab. You may also be interested in instructions for Adding Page Layouts. Below is an overview of the Layout Properties page.
The order that data fields are in is how they will display in the workflow.
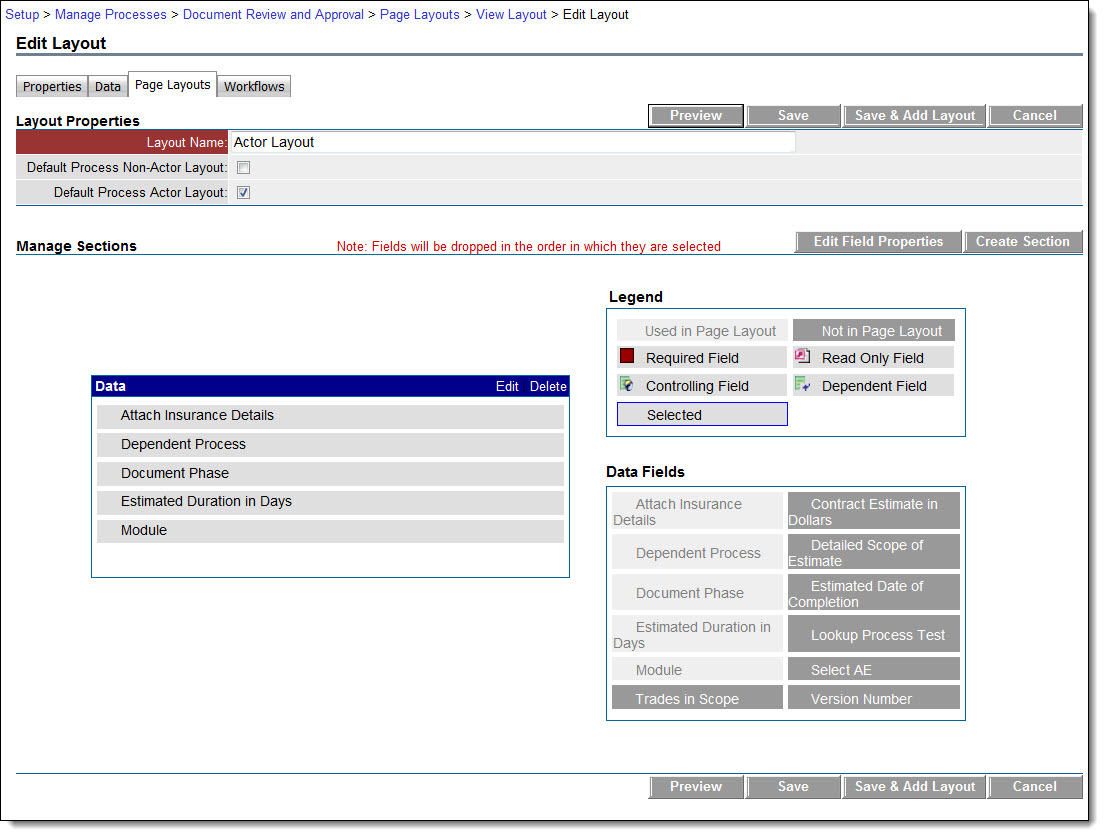
The screen shot above shows the page layout tab in Edit mode.
Fields and Buttons
Different options display in View mode as described below:
- Where Used: This button displays when the page layout is in view mode. Click this button to view in which workflows this page layout is being used.
- Preview: Click this button to see an end user view of the page layout.
- Edit: This button displays when the page layout is in view mode. Click this button to modify the page layout.
- Delete: This button displays when the page layout is in view mode. Click this button to delete the page layout.
- Save: Click this button to save the layout.
- Save & Add Layout: Click this button to save the layout and add another page layout.
- Copy: This button displays when a page layout is in view mode.
 Tip
TipCopying page layouts is a quick way to create new layouts with slight modifications as oppose to creating an entirely new layout from scratch.
- Cancel: Click this button to cancel any changes since last saved.
- Layout Name: Enter the name of Name of the page layout in this field.
- Default Process Non-Actor Layout: If checked, this check box will set this layout to be the default non-actor layout. If no non-actor layout is assigned to a workflow or step it will automatically inherit this layout.
- Default Process Actor Layout: Select this check box to make this layout the default actor layout. If no actor layout is assigned to a workflow or step it will automatically inherit this layout.
- Map location permission: This field will be available only for geo-enabled processes that have the map location field enabled. Use the option buttons to specify whether the map location will be Editable or View only. Note that non-actors can only view the process location.
- Manage Sections: This area is designed to manage sections and data fields. With drag and drop capabilities, data fields can be dropped in sections and sections can be moved up and down. You can also modify the data fields and section properties.
- Edit Field Properties: Click this button to display the properties of a selected data field.
- Create Section: Click this button to create a new section. A section must be created before data fields can be added.
- Legend: The Legend indicates the type of field each data field is.
- Data (drop-down arrow): This grid contains all the data fields available to drag and drop into a section. These are all the fields created in the process of adding data fields. The drop-down arrow allows you to select between Data Fields and Module Integration. If you are working on a cost process, it is listed as an option for you to add as a field in the layout. Click one or more of the data fields and drag them over to the Data area.
The order in which you place data fields in this section is how they display in the workflow.
Once data fields are in the data section, right-click selected fields or click the Edit Field Properties button to make fields Read-Only or Required.
- Section: Each section created is visible in the Manage Sections grid. Click the edit or delete links to edit or delete the section. You can edit each data field listed in the section by right clicking the mouse; choices are edit field properties or remove field.