The Workflow Designer allows you to drag and drop different shapes onto the Workflow that perform different functions. Each can help build your workflow to facilitate an automated business process. The workflow includes steps, connectors, conditionals, and spawns all based on actions triggered in each workflow step.
The process is automatically routed through the workflow. When the process reaches a data entry step it will display the associated actor layout to the end user and require that an action be taken, which determines which branch the workflow will follow. Each of these shapes can be dragged onto the Designer grid. Once the shape is dragged onto the screen, the properties window of that shape displays for your input.
The Difference between Edit Mode and Copy Mode
- When in Edit Mode you are not able to deleted process steps, but this is possible in Copy Mode.
- Making changes and then publishing in Edit Mode will affect open instances of the process
- Making changes and then publishing in Copy Mode will not affect option instances of the process.
Fields and Buttons
A brief description of each shape, its function, and a description of the buttons located on the workflow designer page is below:
|
Button/ Shape |
Description |
|---|---|

|
Click Publish to make the process available to all assigned users. Incomplete workflows cannot be published. If process steps are incomplete or a connector is missing, an error message displays the details of the error. Publishing a workflow allows you to assign it to projects or make it available to projects if one is already assigned. When attempting to publish a workflow that has already been used by an end user, the system grays out certain elements of the process that cannot be changed, there are fields, however that can be changed. If you need to change fields that cannot be altered, then a new workflow has to be created with a different name. The newly created workflow will not be assigned to any projects; you must physically make it the account default if you so choose. For information on assigning projects to workflows, see the Account Default check box description on the Add New/Edit Workflow Page. |

|
Click Save to save the workflow. You can close out of the workflow and return to it later on. Saved workflows are not visible to anyone else and are not available for use in any projects. The process will only use published workflows. |

|
Click Error Check to validate that the workflow is correct. Any errors will produce a detailed error message. |

|
Click Print to print the workflow as is. |

|
Click Cancel to close the Workflow dialog box without saving changes. |

|
The start icon displays by default. Every workflow process requires a start step. Right-click this icon and select Properties to edit step name, select a process layout, change icon color, or add a description. |

|
Data Entry is used to record process steps. Data Entry steps are to be completed by an actor of the step. Each time data is entered, an actor must take an action so that the workflow can move on its path toward completion. In addition, there may be required data fields. For example, a step could consist of a Director reviewing a set of data and selecting an Approve action. Drag this icon to the designer to open the Edit Step Dialog Box and customize step properties. |

|
Conditional steps are defined statements that can take a path of true or false. It is configured to let the system determine the route in the workflow. For example, if a contract or PO has a commitment value greater than $5,000 it may have to be routed to the Assistant Director. Otherwise the project manager can approve it without requiring executive management approval. Double-click or drag and drop this shape to the designer to open the Edit Conditional Branch dialog and configure the details of this condition. Drag this icon to the designer to open the Edit Conditional Branch Dialog Box and customize step properties. |

|
The spawn process icon is used to kick off another process at the end of the process being created. Using this feature, you are able automate the start of another process that is dependent on the one you're creating. It is important to note that you drag and drop this icon in the graphical pane. The Edit Step dialog box displays for you to input all pertinent information. Drag this icon to the designer to open the Spawn Edit Step Dialog Box and customize step properties. |

|
The connector is used to connect the steps in the workflow. Right-click the connector and click Properties to open the Connector Properties dialog box. From here you choose the start and end steps to connect. You must also choose an action. Only available actions that have not yet been used are available in the drop-down arrow. Optionally, you can rename the connector, choose the connector shape and design the workflow step by choosing where the points of the connector will be placed. |
|
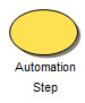
The Automation step icon is used to automatically archive a mail merge template in the document library and/or send it in an email. This step can be added within any sequence of the workflow. Drag this icon to the designer to open the Edit Automation Step Dialog Box and customize step properties. |

|
The finish icon displays by default. Every workflow process requires a finish step. Right-click this icon and select Properties to edit step name, select roles that should be notified when the step enters the finish step, select a process layout, change icon color, or add a description. |