You can start and configure a new Bluebeam Studio session from within Trimble Unity Construct.
Upon clicking the Bluebeam Studio link from the Documents module or Attached Documents tab you will open the Bluebeam Studio Integration page. From this page, you can start a new session from the New Session tab or update an existing session on the My Sessions tab.
- For the Bluebeam integration to work successfully, all PDF files must first be added to the Trimble Unity Construct Documents module first and then added to the Studio session using the integration. Files added directly to the Studio session outside of the integration will not be versioned back into Trimble Unity Construct.
For a detailed overview, see Use Bluebeam Studio as a Session Creator.
To start a new Bluebeam Studio session
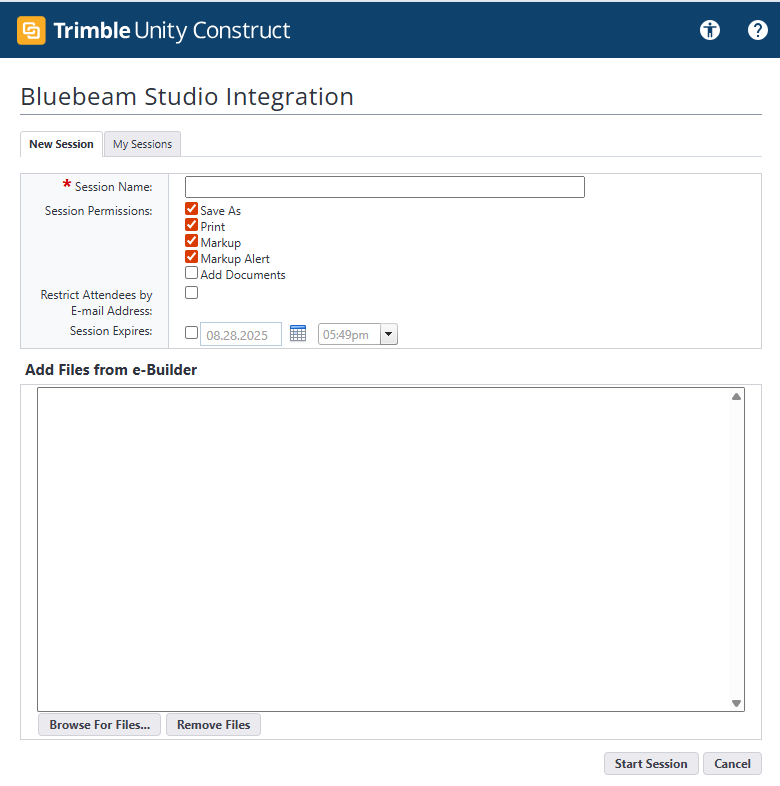
- Open the Bluebeam Studio Integration page from the Project Documents page or the Attached Documents tab. The New Session tab displays by default. The selected files will be automatically added to the file list for the Studio Session.
- Complete the following fields (the required fields are marked with an *):
- Session Name*: Enter a name for this session. The name does not have to be unique.
- Session Permissions: Select the check boxes to apply the desired permission to all attendees or uncheck them to remove those permissions from the attendees by default.
- Restrict Attendees by E-mail Address: Select this check box to restrict access to the session by email address. You will have the opportunity to add allowed attendees on the next page, or you can do it after the session has been created. To allow any user with the Session ID to join the session, uncheck this option.
- Session Expires: Enter or select the desired expiration date and time for the session. Expiration dates must be in the future. Back-dated expiration dates are not allowed.
- In the Add Files from e-Builder section, click Browse for Files to browse for and select at least one PDF file to be added to the session.
Files added to the session will be flagged as Checked Out by the session creator. The files selected must not be already checked out by another user. Once the session is completed and finalized, a new version of the file is created in Trimble Unity Construct. Files that were not modified will maintain their previous version.
To add additional files to the session, click Browse for Files. To remove a file from the list, select the file and click Remove Files.
- Click Start Session. A Session ID is assigned automatically.
- In the Session Invitation section, click Lookup to search for an select from account users.
- Enter an invitation message in the Message field.
- Click OK. The new session is established.
- Click the Session ID link to open the Bluebeam session.
- You will be asked to select how you wish to join this Studio Session.
Choose one of the following options based on your Bluebeam license:
- Join in Bluebeam Revu: Select this option to join the session in the Desktop app. This requires you to download and install the software on your computer.
- Join in the Web: Select this option to join the session in the Cloud.
- The first time you log in to start a new Studio Session or to access an existing active Studio Session, you will be required to allow Trimble Unity Construct to access to your Bluebeam account. Allowing access completes the authentication.
- In the Bluebeam Studio session, add markups to the files as needed.
- You can add files or invite users to the session.
- Click Save.
- View mark-ups made by others to the files.
- Close the window to close the session.