You can perform the following actions on tasks:
In most cases, tasks can be imported using Microsoft Project. However, if you have permission to create tasks, you can add tasks to the schedule one at a time.
- Open the Schedule page.
- In the Tasks section of the toolbar, click Add Task.
- Edit the task inline.
- Click Save.
The task is added to the bottom of the schedule
To edit a task's details, double-click on the task to open it in the Task Editor.
- Open the Schedule page.
- Right click on a task where you would like to add your new task.
- Select Add from the drop down, and then choose where you wish to add the new task.
- Click Save.
The task is added and ready for inline editing.
After tasks have been added to the schedule via an import, they are in draft status until activated. Note that project participants can still view draft tasks.
To activate tasks
- Open the Schedule page.
- Right-click on the tasks you want to activate and select Activate.
Tasks can be moved within the schedule to update either the sequence or WBS.
To move tasks within a schedule
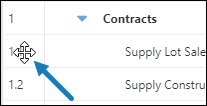
- Select the task you wish to move by clicking on the task's number.
- Do any of the following:
- Drag it up or down within the schedule.
- To make it a subtask, move it directly below the parent task, and then click the
 Indent in the Tasks section of the toolbar.
 - To move a subtask out of a parent task or to make it a summary task, click the
 Outdent in the Tasks section of the toolbar.

Tasks can be updated by modifying details such as title, dates and duration. You can also reassign, activate or complete multiple tasks at a time.
- Open the Schedule page.
- Click on the task you wish to edit.
- Make all necessary changes.
- Click Save.
The input fields become editable.

Task durations can also be modified by selecting the right side of the Gantt bar for the related task and moving it left or right to decrease or increase the task duration.
- Open the Schedule page.
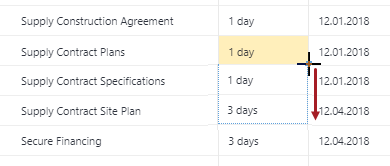
- Click and hold the fill handle in the bottom right corner of the cell that contains the value.
- Drag the fill handle to select the cells that you want to contain the same value.
- Click Save.

- Open the Schedule page.
- Right-click on the task and select Task Details.
- Make all necessary changes.
- Click OK.
The Task Editor dialog is displayed.
If approval is required for date changes or percent complete, a message displays informing you that an approval request was sent to the Task Manager. Click Continue.
For a description on each of the fields, see Task Editor.
This feature is available only if you have the Resource Management feature enabled.
- Open the Schedule page.
- Click the Assigned Resources column next to the task you want to assign a resource to.
- Select the check box(es) of the resources to be assigned to the task.
- For each of the selected resources, select their role, the percentage of work that the resource's time is assigned to a task, and the total work hours.
- Click Close.
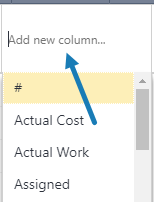
If the Assigned Resources column is not visible, click Add new column and select the new column.

A dialog with a list of resources is displayed.
Users with access to the project schedule can mark tasks as complete. Marking tasks complete is equivalent to updating the percent complete to 100.
- Open the Schedule page.
- Right-click on the task and select 100% Complete.
- Click Save.
When marking a task as complete, you can also provide additional details.
- Open the Schedule page.
- Right-click on the task and select Task Details.
- On the General tab, set % complete to 100.
- Enter additional details.
- Click OK.
- Click Save.
The Task Editor dialog is displayed.
If a task becomes obsolete, delete it from the schedule.
To delete tasks
- Open the Schedule page.
- Right-click on the task and select Delete.
- Click Delete.
- Click Save.
Tasks that are linked to the cash flow cannot be deleted. If these associations exist, these tasks will be listed and you will only be able to cancel this action.