Using the built-in redlining feature, you can redline documents. You can then save the redline markups to your local machine as a PDF file. This is the only way to save redlined files and make them available outside of e-Builder. This also allows you to make marked up files available to team members who do not have permission to view redlined documents.
To redline documents
- Go to the Project Documents page.
- Navigate to the file you want to redline.
- Click the Redline link located below the name of the file you wish to redline.
- Click the Markup icon
 located in the upper left corner of the window.
 - Click New Markup.
- From the Annotations drop down, select the type of markup you wish to make.
- Once the document has been marked up, do any of the following:
- To save the file, click the Markup icon > Save Markup. Enter a unique name and then click OK.
- To save the file as a PDF, click the More icon
 > Publish to PDF.
 - To print the file, click the More icon > Print.
The file opens up in a separate redlining window.
You may need to maximize the redlining window to see the More icon.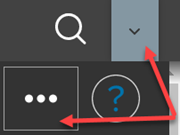
Click the Help icon located on the upper right corner of the window. A new window displays the in-app help that describes all the options available on the redline window. Depending on your browser settings, your redline window may be ‘hidden’ behind the help window.