Workflows
Use the Workflows page to access workflows that are mobile-enabled.
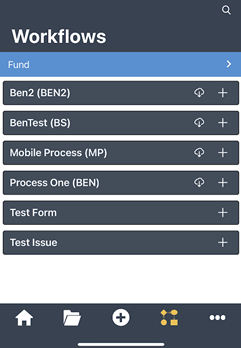
On the Workflows page, instances that are assigned to you will appear under the workflows in my court list. Workflows that are mobile-enabled and not linked to the cost module will be displayed in the e-Builder mobile app. Up to 2 instances of the workflow will be listed in fields below the workflow title.
If no project is selected, the list will be all encompassing. If a project is selected, the Workflows in my court list will be filtered by the selected project.
Workflows that are mobile-enabled and not linked to the cost module will be displayed in the e-Builder mobile app. Up to 2 instances of the workflow will be listed in fields below the workflow title.
You can tap See All below the workflow list to see more instances. This option will only be available if there are instances to see.
Download Workflows for Offline Use
The e-Builder mobile application allows you to download workflows while you are online so that you can use them later to initiate new workflow instances while in offline mode.
The e-Builder Offline Mobile Enabled check box must be enabled for the process by an Administrator on the Properties Tab of the process for it to be mobile-enabled and available for offline use. For more details on how to enable offline use, see Manage Processes.
- Tap
 and select the project.
 - Tap
 .
. - Tap
 beside a workflow to download it.
You can see a progress indicator while the workflows are downloaded. If an error occurs, the e-Builder mobile app will display an error message and allow you to try again.
Start a Workflow Instance
Workflows can be initiated from the ![]() icon next to any workflow title. You can fill out basic fields, controlling list fields, dynamic grids, perform file uploads, and then save the workflow form.
icon next to any workflow title. You can fill out basic fields, controlling list fields, dynamic grids, perform file uploads, and then save the workflow form.
If you have a previously downloaded workflow, tap the ![]() icon to start a new workflow instance while in offline mode. While you are offline, the Workflows home page will display a list of draft or offline workflows with a status of “Waiting to Sync”. These workflows will be automatically synced once you are back online.
icon to start a new workflow instance while in offline mode. While you are offline, the Workflows home page will display a list of draft or offline workflows with a status of “Waiting to Sync”. These workflows will be automatically synced once you are back online.
- Tap and select the project.
- Tap .
- Tap
 next to any workflow title to start a new instance.
You can also tap
 on the Tab bar to quickly start workflow instances from the recently accessed workflows list.
 - Complete the fields on the Details tab of the workflow.
Ensure that you complete all required fields since they must be filled out before you can post a form or save an action.
- Tap the Attachments tab and then tap to add files or other instances to the current workflow instance.
- Tap
 . You will be prompted to select whether you wish to save the workflow instance as a draft or if you want to post the form.
Take Action on a Workflow Instance
The Take Action feature allows you to download action meta-data, add comments, add actors, and give review and comment access on a mobile process.
If action is needed on a workflow, the Take Action drop-down will be presented when the instance is opened. You will also be presented with page(s) for any action options enabled by the workflow configuration.
Once finished, you will be presented with a message that the workflow instance has been saved and queued for synchronization when you are back online.
Some actions are not available from the mobile application. If the action is not supported, you will be prompted to complete the action from the web application.
- Tap and select the project.
- Tap .
Tap
on the tab bar to quickly start workflow instances from the recently accessed workflows list. - Tap the Take Action drop-down list and select the action.
Any required fields must be filled out before you can save an action.
- Tap Save.
- Tap .
Add Comments on a Workflow Instance
While in a workflow instance, you can add comments through the comments tab at the top of the screen.
The most recent comment will be displayed at the bottom similar to other common chat programs.
- Tap and select the project.
- Tap .
- Tap a workflow instance to view it.
- Tap the Comments tab.
- Tap the Add Comment field and enter your comment.
The Private comment check box will be displayed below your comment if this feature has been enabled. This feature allows only users in select roles to view and add private comments. Select this check box to make your comment private.
- Tap
 .
.