Depending on your account settings, you may or may not be able to import forms. The Forms import capability must be enabled by an e-Builder Support team member. For more information, please contact your account manager. Once the option is available, only users with Import permissions can perform this task.
Importing forms allow you to import form instances of a particular form type. This helps administrators save time by eliminating data entry efforts. Imports can be of new or existing forms. For existing forms, simply add the project name, form counter and field details.
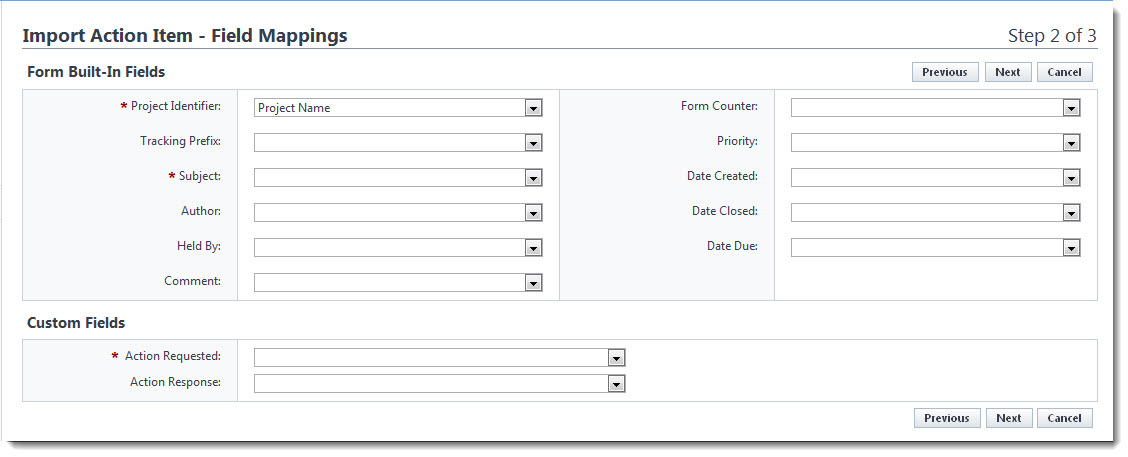
e-Builder built-in fields are mapped to the columns of your Excel® spreadsheet. The columns in your import file do not have to match the e-Builder built-in fields exactly, but if they do, the data will automatically populate on the Field Mappings page and you will not have to physically map the fields. All of the built-in fields do not have to be included your import file, but at a minimum, the required fields do. This includes required custom fields as well.

Sample import file of the Action Item form type:

- Open the Forms page.
- On the Forms tab, click the Import Forms link.
- Complete the required fields.
- Click Next.
- Complete the required fields.
- Map the fields to the columns in the Excel file.
- Click Next.
- If the file was mapped correctly and there aren't any exceptions or warnings, click Import.
- Click the Exceptions tab to review the exceptions and make necessary changes to the spreadsheet.
- Click Previous twice to return to Step 1 and then re-import the file.
- Click Finish.

The Import Forms page is displayed.
For an overview of this page, see Import Forms Page Overview.
—Or—
If there are exceptions, the Import button will be disabled.