Groups
Setting up a group allows you to consistently send communication to the same collection of people when needed. These groups can be created for personal use or shared with all users.
-
From the top navigation tabs, click the Contacts tab.
-
To view groups of contacts, click the Groups tab. All available groups are displayed.
Groups Tab
From the Contacts module, you can access the Groups tab where groups can be set up, viewed, and edited.
- From the top navigation tabs, click the Contacts tab.
- To view groups of contacts, click the Groups tab.
- Click Add.
- On the Add Group page, complete all the necessary fields:
- Choose Name: Enter a name for the group. This field is required.
- Group ID: Enter a unique identifier for the group. While more than one group can have the same name, the ID must be unique. This field is required.
- Description: Enter a description for the group.
- Available: From this drop-down list, select the projects that the group is available for.
- Privacy: Select who can view the group.
- Add Members: Specify the members to be assigned to the group. Click Lookup to access the Lookup window where you can view a list of all the contacts and users.
- Here, you can select multiple people from the list to add to the group.
- You can also narrow down the results by entering data into the fields or by selecting the Users Only or Contacts Only check boxes at the top of the page.
- You can also leave all filtering blank to display all options. Click Filter to populate the list.
The list will not populate until the Filter button has been clicked.
- Select the members to add to the group and select Insert Selected.
Members without email addresses will not be displayed on the group list.
- Click Save. The group will be created and will be displayed on the Groups tab.
- From the top navigation tabs, click the Contacts tab.
- To view groups of contacts, click the Groups tab.
- Click Edit beside the group you wish to modify.
- On the Edit Group page, complete all the necessary fields:
- Choose Name: The name for the group. This field is required.
- Group ID: A unique identifier for the group. While more than one group can have the same name, the ID must be unique. This field is required.
- Description: A description for the group.
- Available: The projects that the group is available for.
- Privacy: The visibility of the group to other users.
- Add Members: Specify the members to be assigned to the group. Click Lookup to access the Lookup window where you can view a list of all the contacts and users.
- Here, you can select multiple people from the list to add to the group.
- You can also narrow down the results by entering data into the fields or by selecting the Users Only or Contacts Only check boxes at the top of the page.
- You can also leave all filtering blank to display all options. Click Filter to populate the list.
The list will not populate until the Filter button has been clicked.
- Select the members to add to the group and select Insert Selected.
Members without email addresses will not be displayed on the group list.
- In the Members section, click Remove beside the name of any member you wish to remove from the group.
- Click Save. The group will be updated with your changes.
- From the top navigation tabs, click the Contacts tab.
- To view groups of contacts, click the Groups tab.
- Click Delete beside the group you wish to delete.
Deletion is only available on groups that you have created. Admin set up groups will be read-only for users who are not administrators.
- You will be asked to confirm the deletion. Click Yes to proceed with permanently deleting the group.
Apply a Group
Groups can be applied to multiple places: Calendar Events, Process Instances, Recipients of Reports, Submittals, and other communications throughout the software.
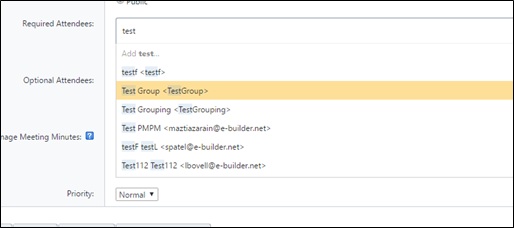
Enter the name or part of the name in the recipient field (where permitted) and then the group name will be populated in the list.
For example, you can apply a group to a Calendar event.