Export Header and Footer
To manage the export header and footer for your account
- Click Setup. In the Administration Tools menu, expand Settings and click Export Header and Footer. The Export Header and Footer page is displayed.
- Enter text and click the appropriate icon contained in each grid to insert additional tags.
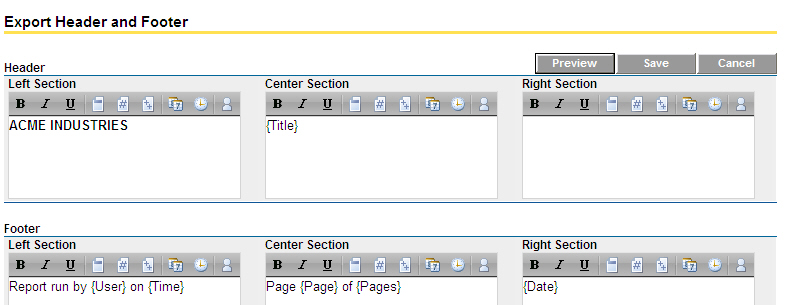
Each icon is described below:
 : Bold the text.
 : Italicize the text.
 : Underline the text.
 : Insert page title / report name (e.g. Anticipated Cost Report)
 : Insert page number.
 : Insert number of pages.
 : Insert today's date.
 : Insert time report is exported.
 : Insert logged in user.
- Click Preview to download and save a blank MS Excel file (Preview.xls) with the header and footer settings configured.
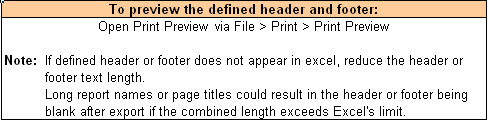
- Open the MS Excel file. The following explanation will be displayed in the file as shown below.
To preview the defined header and footer:
Open Print Preview. (File > Print > Print Preview)
If the defined header or footer does not appear in Excel, reduce the header or footer text length. Long report names or page titles could result in the header or footer being blank after export if the combined length exceeds Excel's limit. - Click Save to save the current settings.