To get started with Project Issues, you need to first create a project issues form type. This form type differs from the standard e-Builder form in that there are three default field names that cannot be changed one of which is Issue Category. Edit the options of this data field to include your different issue categories. Instructions are provided below.
To create a project issue form
- Go to Forms Settings.
- Click Manage Forms.
- Click Create New Form Type.
- Complete all required fields, and specifically, the following:
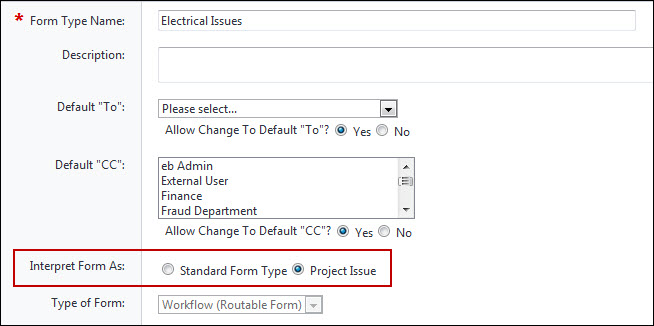
- In the Interpret Form As field, select the Project Issue radio button.
- Click Create.
- Click Add New Section.
- Enter a name and description of the section, and then click Save.
- Repeat steps 6 and 7 to add more sections to the project issue form.
- Click Next. The Add Form Field(s) page is displayed.
- Enter field names and specify the sections each field belongs to.
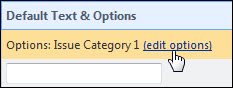
- Click the edit options link to specify issue category options such as Mechanical, Electrical, and Safety, for example.
- Enter category options, and then click Save.
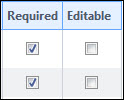
- On the Add Form Field(s) page, specify whether each field is required or optional by selecting the appropriate check boxes.
- Click Next. The Form Type Permissions page is displayed.
- Specify permissions for accessing this form.
- Click OK to save the completed the form.
For instructions, see Access Forms Settings.

The Create New Form Type page is displayed.
The Add Form Section(s) page is displayed.
The first three field names are required and display by default: Issue Category, Location, and Event Name.
Users will be required to choose an issue category when completing the form.
Click the Preview tab to review the form and if necessary, navigate to other tabs to make changes. Once completed, click the Permissions tab.